The following describes the repair of the "tailshaft" bushing on a 1989 740 Turbo with AW71 automatic transmission. The good news is that, with one exception, this turned out to be a straightforward and satisfying repair. The bad news relates to the removal of the gasket between the transmission and the rear housing as discussed below.
There are a couple of things to mention in the interest of full disclosure. Firstly, this repair was done with the use of a hoist which made access easier and eliminated set-up time. The same repair done by a shop a couple of years ago on another 740 using the "puller" method referred to in the side bar cost just under $300.00 inclusive of taxes and a new transmission mount. Actual work time for the repair as described here, excluding gasket removal, was around two and half hours. However, this doubled when gasket removal was included. In this light, the reader can decide whether the repair is worth tackling.
The need for replacement of the bushing was evident by a mild but persistent vibration right under the floorboards. Inspection revealed a surprising amount of freeplay where the driveshaft joins the rear flange ("tailshaft") from the transmission. This freeplay was clearly in the tailshaft, not the U-joint, and could be seen and felt even under light hand pressure.
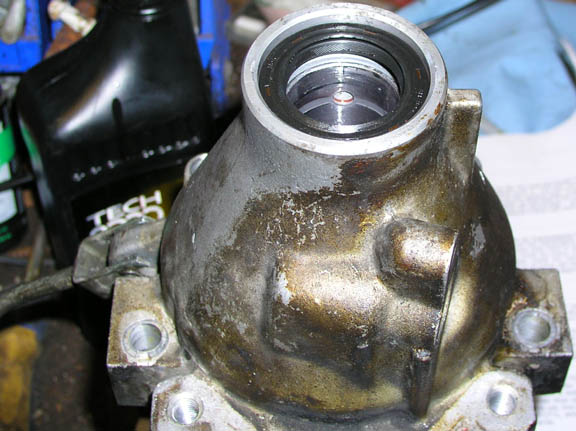
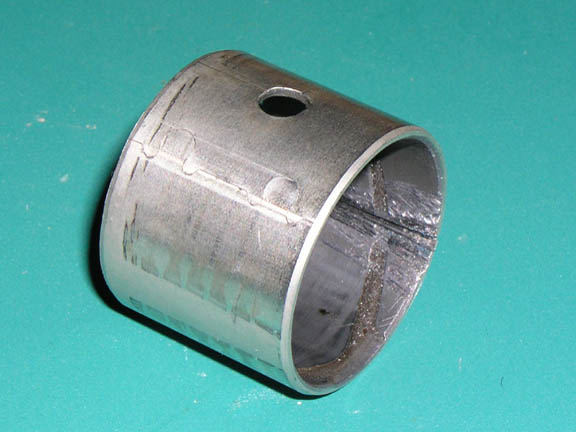
The tailshaft itself rotates in a bushing mounted in a round shape housing ("extension housing") bolted to the rear of the transmission. The bushing is simply a thin soft-metal tube of about 2" inches diameter which fits into a bore in this housing. As the bushing wears it allows freeplay to creep into the driveline thus setting up vibration. Others (meaning Cam here at the site) have described it more as a cyclical droning noise at highway speed.
A good review of the procedures involved is found on the "Brickboard" website although, inevitably, some minor differences were found and these are noted below.
A summary of the steps I used for this repair are as follows:
- Drain transmission pan. This takes a few minutes and will drain off perhaps 2 liters of transmission fluid-enough to prevent a messy spill when the extension housing is removed from the rear of the transmission.
- Scribe or mark the rear and driveshaft flanges where they bolt together. To maintain original balancing, I also lined these marks up to a mark on the extension housing to ensure the entire unit could be re-installed to the transmission in exactly the same configuration as it was removed.
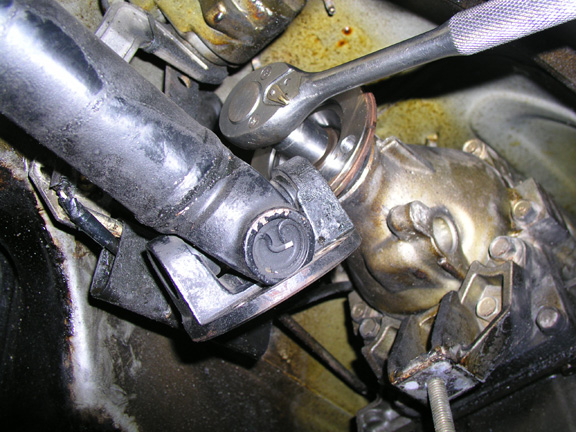
- Unbolt the driveshaft from the tailshaft flange. This requires the removal of 4 bolts (15mm bolt and 17mm nut, not the 14mm set-up I'd been used to on other Volvos). I found it necessary to rotate the driveshaft to gain access to each nut in sequence. The car must be in neutral and at least one rear wheel off the ground. Prior to removal of the final bolt, rotate the driveshaft so it aligns with your initial reference mark on the extension housing as described in item 2 above and place the transmission in Park. The last bolt can now be removed and the driveshaft separated from the transmission flange. The driveshaft can be left hanging, no tie-up was necessary as it is supported by its centre-bearing. There was enough side to side movement to move it out of the way as required.
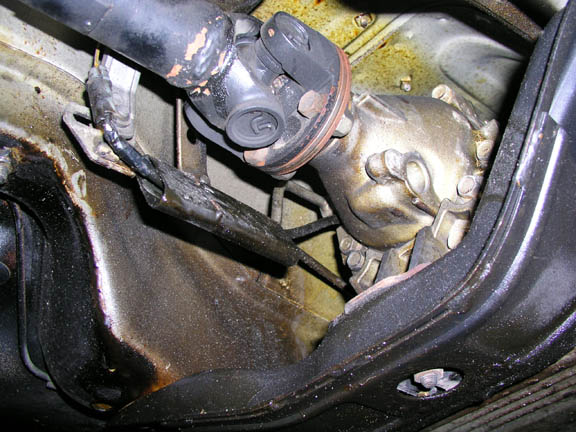
- Disconnect the rear transmission linkage from the extension housing. This was easier than expected as it was only necessary to remove a small "C" clip and washer from its pivot pin. The pivot pin is then pushed out of its hole in the linkage arm to free it from the housing. (Note the Brickboard recommends marking the location of the linkage components prior to removal. I didn't find this necessary so it may apply on earlier versions. But if in doubt, mark).
- Disconnect wiring harness. This only requires pulling the white plastic wiring clip apart and threading the clip back through the protective sleeve hanging from the linkage arm.
- Support the transmission. Take up the weight of the transmission prior to removing the supporting cross member by using a jack or some other supporting device and a flat piece of wood under the transmission pan.
- Remove the transmission mount nut. This nut (17mm) is located in a recess in the centre of the cross-member and is readily visible from underneath the car.
- Remove transmission cross-member. The cross member is held in place by 4 bolts (14mm), two on each side. Although probably not necessary, I scribed around each corner of the cross member to ensure it could be replaced in its original position on reassembly. Once the cross-member is removed, the extension housing is fully accessible for removal.
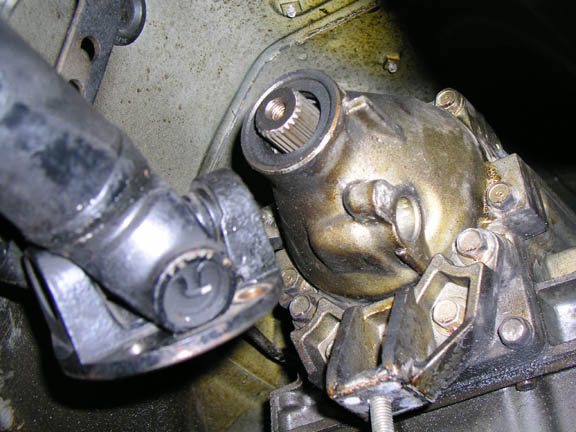
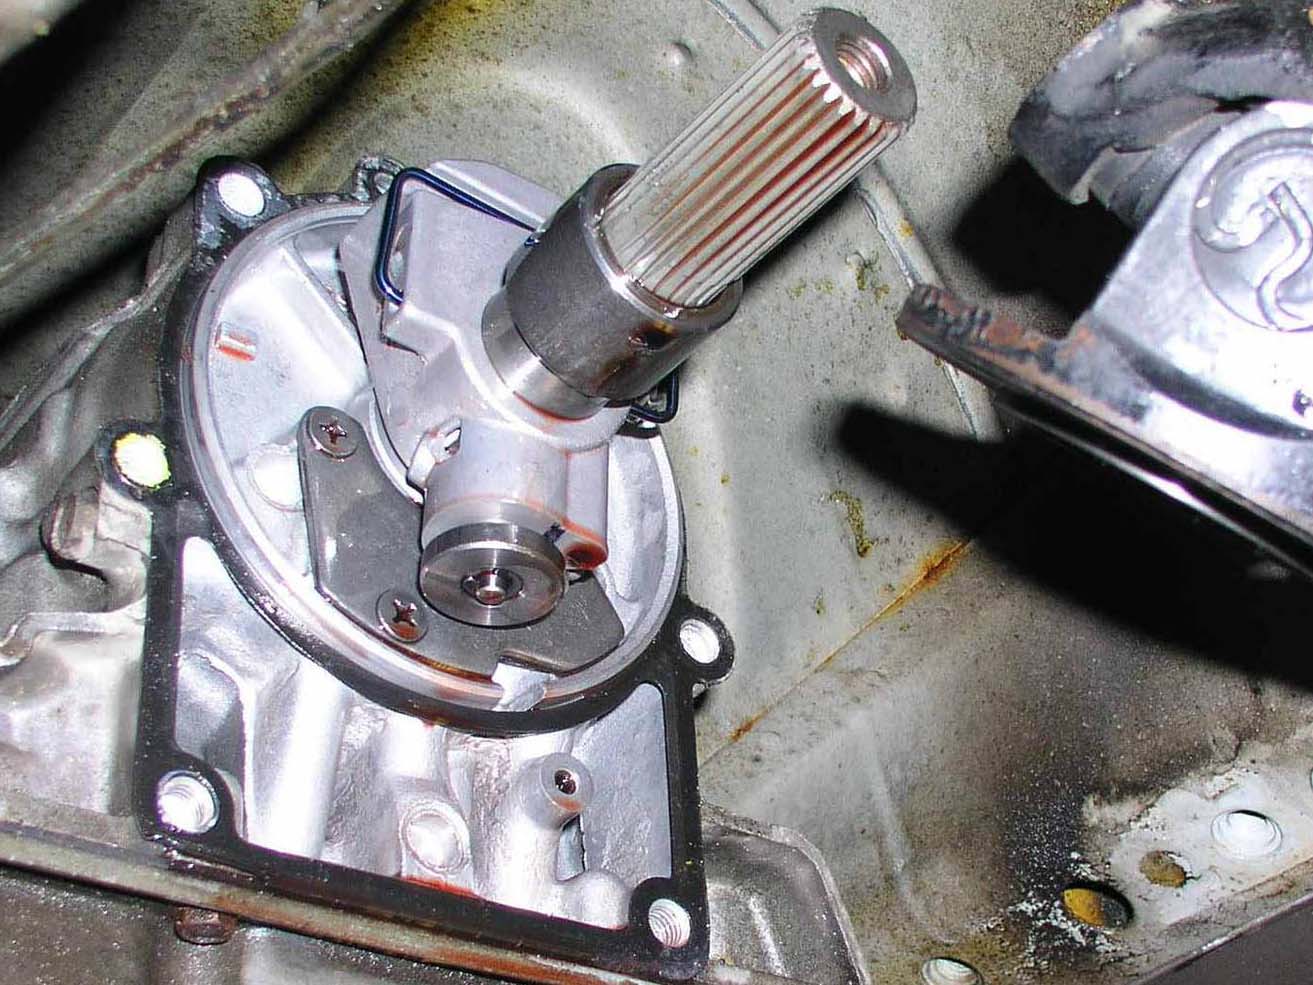
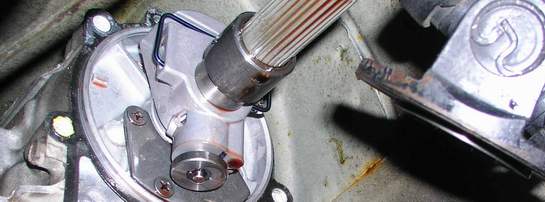
- Remove the tailshaft flange nut (19mm). I was expecting this would require some force to remove but it came off easily. Once the nut is removed the tailshaft can be drawn backwards off the splined transmission shaft and through the rear seal. A couple of things are worth noting here. The Brickboard refers to the centre flange nut being 30mm, but possibly this applies to earlier models as mine was 19mm. It also refers to the removal of the speedometer drive gear but this was not applicable to my car as it is equipped with an electronic speedometer sensor common to 1986 and later 740's.
- Remove extension housing. The housing is secured to the rear of the transmission by 6 bolts (14mm). Note that the bottom two bolts are shorter than the top four. To access the bottom bolts it is desirable to also remove the 4 bolts (14mm) which secure the carrier which attaches the transmission to the cross member. This also makes the housing a little easier to work on later. It may be necessary to tap the housing a little to free it from the gasket.
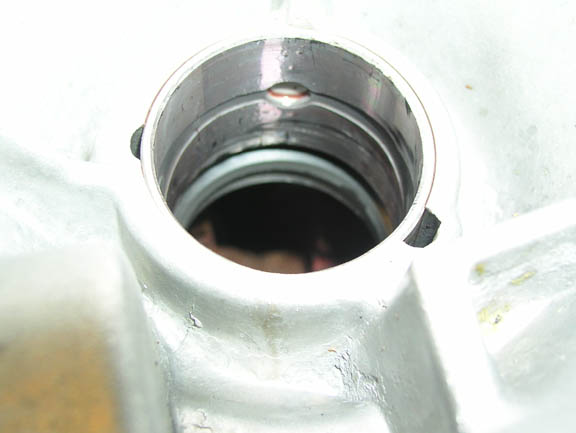
- Remove rear seal. With the housing off remove the oil seal taking care not to damage its seating surface.
- Remove old bushing. I thought this would simply require tapping the bushing out from the back of its bore with a socket of similar size but it refused to budge. Luckily the Brickboard suggested an alternative method and that was to hacksaw the bushing over one of the machined channels which run lengthwise in the bore (this prevents the bore from being damaged when the saw cuts through the bushing). Being of softer metal, the bushing cut easily and in fact popped out of the bore on its own before I was through the cut. Another alternative would be to have a machine shop press it out as suggested by some Brickboard correspondents. The bushing has a hole in it which probably allows lubrication for the tailshaft as it rotates in the bushing. Note the orientation of this hole so that the new bushing can be placed back in the same position. Mine had the hole set to the top of the bore which I assume is standard.
- Install new bushing. Make sure the inside of the housing is clean and lubricate the outside of the new bushing and the inside of the bore with transmission fluid. Align the hole in the bushing to its original position and squarely seat the bushing before inserting it into the bore. I used a round piece of plastic and tapped this in a circular manner to keep it as true as possible as it progressed into the bore. In the process I still managed to put a slight burr on the inside lip of the bushing which was easily cleaned up by chamfering the affected spot with a few light file strokes. You may want to check the fit of the tailshaft in the new bushing afterwards.
- Lubricate and install the new oil seal. It's sometimes recommended to set a seal a little deeper than its original position to find an unworn spot on the shaft
- Remove old housing gasket. The gasket itself is a thin paper type. The Brickboard refers to this as the most frustrating part of the job and it's no exaggeration. It might have gone easier with a proper gasket scraper rather than small small pieces of a utility blade but the upper part of the gasket in the transmission tunnel doesn't leave much room to manuoevre. Dropping the transmission a little helped. Ensure no pieces of old gasket are left in any recesses on the back of the transmission. In retrospect, given that the old gasket remained completely intact against the mating surface of the transmission, I wonder if I could have gotten away with simply using the old gasket rather than replacing it with a new one.
- Re-installation of housing and tail shaft. This pretty much follows the reverse of the procedures described above. A few things to note. After the housing is bolted down, align the scribe marks on the tail shaft to your mark on the housing so the tailshaft is fitted back in its original position. The tightening torque listed in Bentley's manual for the tailshaft flange nut is 30 to 36 ft-lb. Installation of a new transmission mount, if one is required at all, is straightforward and simply requires unbolting the old one from the transmission cross-member and fitting the new one in its place.
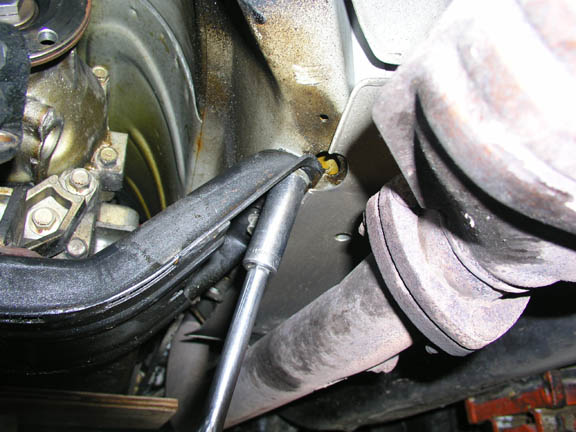
Photos
Photos of the operation. Each photo will link to a larger version of same. Each photo is higher than 200 kB.